The joys of kayaking cannot be understated, providing an ideal way to enjoy the water, experience nature, and engage in a full-body workout. However, storing your kayak when it’s not in use can be a challenge. Given the size and shape of most kayaks, vertical storage is often the most space-efficient method, especially if you’re limited on space. This article will guide you through the process on how to store your kayak vertically, ensuring its safety and prolonging its lifespan.
Why Store a Kayak Vertically?
1. Space-Efficiency:
- Reduced Footprint: Storing your kayak vertically uses less floor space, making it ideal for compact garages or storage rooms.
- Multiple Kayak Storage: With the reduced footprint, you can easily store multiple kayaks vertically in the same space where one might fit horizontally.
2. Prevents Deformations:
- Kayaks stored on their side or improperly supported horizontally can develop deformations or dents over time.
3. Enhanced Air Circulation:
- Vertical storage can lead to better air circulation around the kayak, reducing the chances of mold and mildew buildup.
Considerations Before Storing Vertically
Weight Distribution:
- Ensure that the weight of the kayak is evenly distributed. The cockpit, being the most reinforced area, is generally a safe point of contact.
Stability:
- Make sure that the kayak is stable and will not topple over, potentially causing damage or injury.
Environmental Factors:
- If storing outdoors, consider protective measures against UV rays, rain, snow, or other elements.
Steps to Store a Kayak Vertically
1. Choose a Suitable Location:
- Indoor vs. Outdoor: While indoor storage is ideal, if you choose to store your kayak outdoors, ensure it’s protected from direct sunlight and other elements.
- Away from Traffic: Select a spot where there’s minimal foot or vehicle traffic to prevent accidental bumps.
2. Prepare the Surface:
- Padding: Place soft padding (like foam or rubber matting) on the ground where the kayak’s end will rest.
- Level Surface: Ensure the floor is flat and even to provide a stable base.
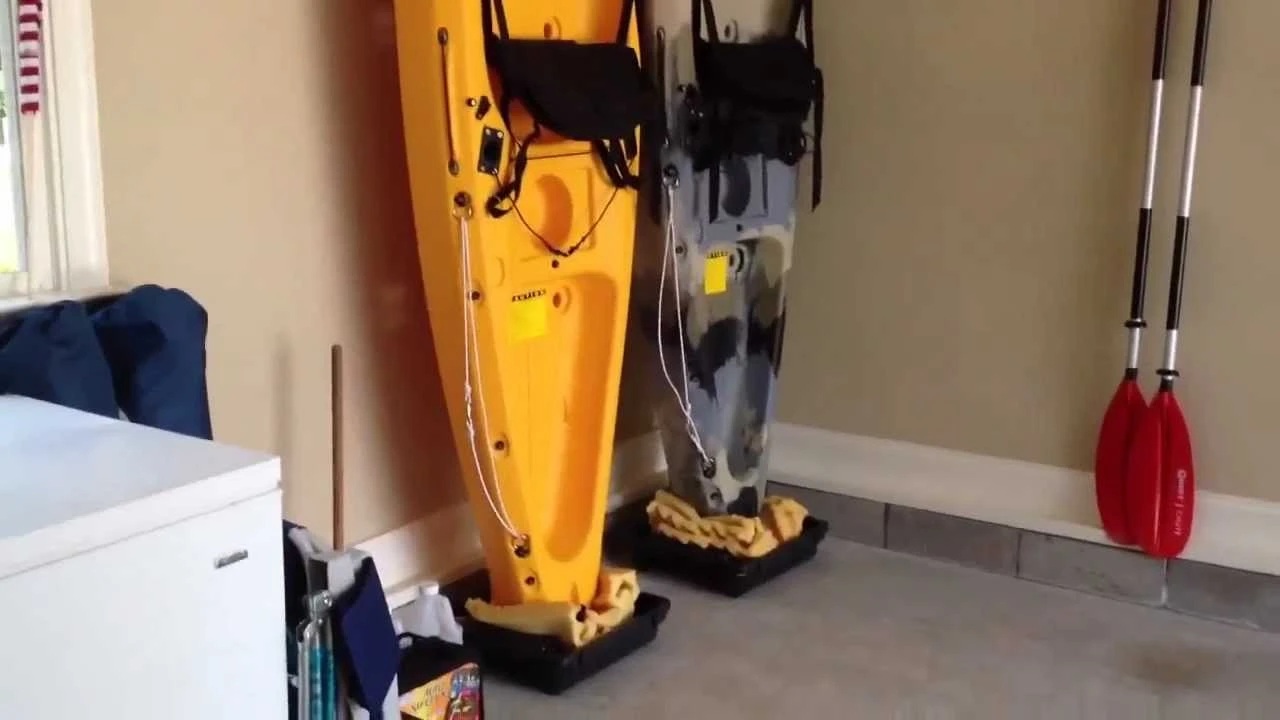
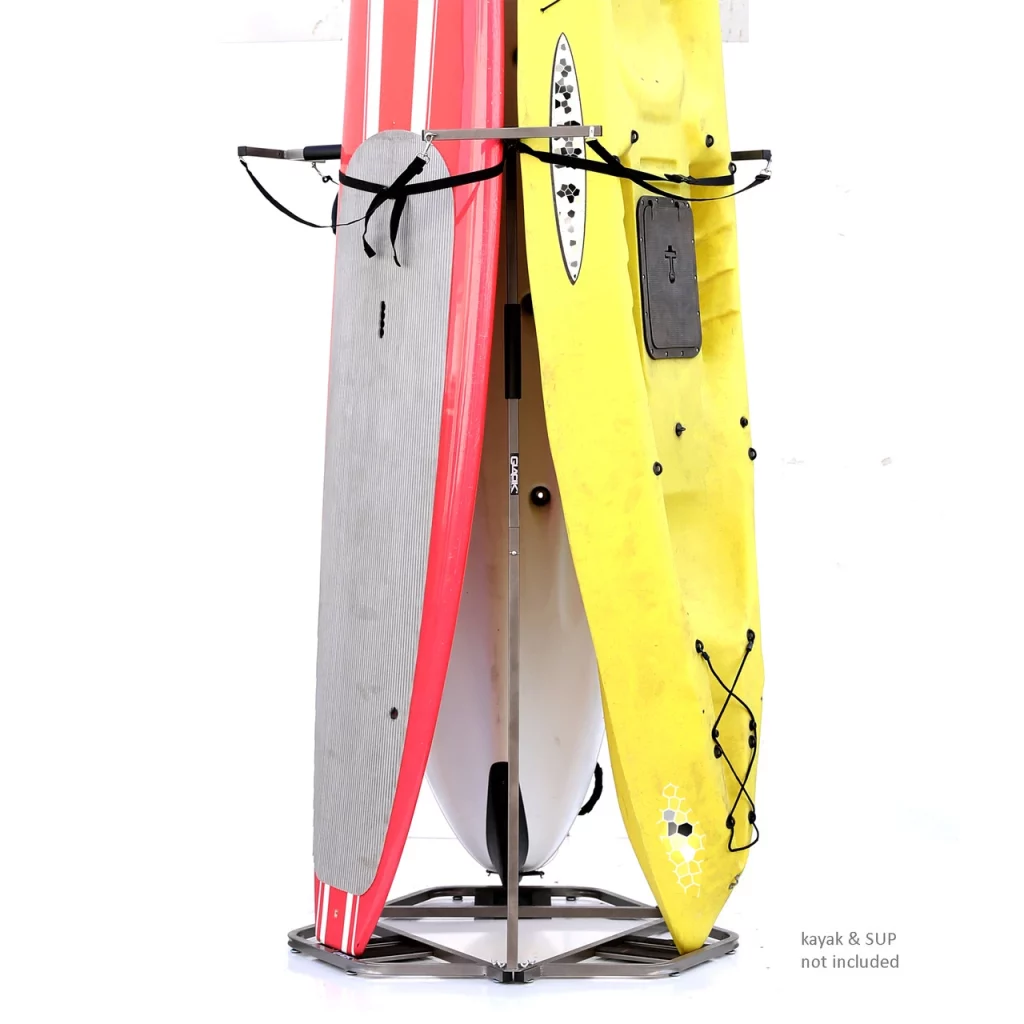
3. Wall Mounting Systems:
- Commercial Racks: There are many commercial vertical racks available designed specifically for kayaks.
- DIY Brackets: If you’re handy, you can create your own brackets using heavy-duty hooks, ensuring they can support the weight of the kayak.
- Anchor Points: Whether you’re using a commercial system or a DIY solution, ensure the mounting points are anchored into wall studs for maximum stability.
4. Lifting the Kayak:
- Solo Method: Stand the kayak on its stern (back end), then carefully pivot it upright, leaning it against the wall.
- With Assistance: If you have a helper, one person can stabilize the kayak at the base while the other sets the cockpit against the wall mounts or brackets.
5. Securing the Kayak:
- Straps: Use straps or bungee cords to secure the kayak to the wall, preventing any potential shift or movement.
- Padding: Ensure there’s padding (like foam) between the kayak’s contact points and the wall or brackets to avoid scratches.
Maintenance & Regular Checks
- Periodic Inspections: Regularly inspect the kayak and storage system for any signs of wear or damage.
- Clean Before Storing: Always clean your kayak before storage, removing any dirt, salt, or debris.
- Cover: If stored outside, use a protective cover to shield your kayak from dust, UV rays, and precipitation.
Conclusion
Storing your kayak vertically is not only space-efficient but can also extend the life of your beloved vessel. By following the above guidelines, you can be assured that your kayak remains in optimal condition, ready for your next adventure on the water. Whether you opt for a commercial rack or a DIY solution, the key is to ensure stability and protection from potential damage. Happy kayaking!
Read more about kayaks:
- What to Wear for Kayaking in Summer
- How to Store a Kayak in the Garage
- What is a Skeg on a Kayak
- What is a Tandem Kayak
- How to Build a Homemade Kayak Launch
- How to Get in a Kayak
- What to Wear for Kayaking?
- How to Transport a Kayak Without a Roof Rack?
- How to Build a Kayak Rack for an RV?
- Are Inflatable Kayaks Safe?
- How to Build a Rack for Kayaks?
- Do Kayaks Have a Weight Limit?
- Wilderness Systems Pungo 120 Kayak Review
- Is it hard to kayak?
- How to Lock a Kayak?
- Where to Kayak with Manatees?
- Exploring the Benefits of Kayaks with a Rudder

Hi, I’m Steve, the passionate kayaking enthusiast behind Outdoor Bravo. As an avid adventurer and nature lover, kayaking has been a central part of my life for as long as I can remember. My love affair with the water began during my childhood, and it has only grown stronger over the years. From serene lakes to rushing rivers and even challenging ocean tides, I’ve navigated various water bodies, seeking new thrills and unforgettable experiences.