Kayaking is an immensely popular outdoor activity enjoyed by enthusiasts around the world. Whether navigating serene lakes or rushing rivers, the experience can be both relaxing and exhilarating. However, the adventure can come to a sudden halt if your kayak develops a hole. In this article, we will cover the essential techniques on how to fix a hole in a kayak, addressing the most common questions about this vital repair process.
Assessing the Damage
Before you can fix a hole in a kayak, understanding the extent of the damage is essential.
Types of Damage
- Small Cracks or Scratches: These can usually be repaired easily at home.
- Large Holes or Cracks: These may require professional repair, especially if in a critical area of the kayak.
Locate the Damage
- Visual Inspection: Look for visible cracks, holes, or abrasions.
- Water Test: Fill the kayak with water or spray it with a hose to identify any leaks.
Tools and Materials Required
Having the right tools and materials at hand will make the repair process smooth and effective.
- For Plastic Kayaks:
- Plastic welding kit or heat gun
- Plastic repair material (matching the type of plastic used in your kayak)
- Sandpaper
- For Composite Kayaks:
- Epoxy resin
- Fiberglass or carbon fiber cloth
- Sandpaper
- Paint or gel coat (optional)
Repair Methods
Different types of kayaks require specific repair techniques.
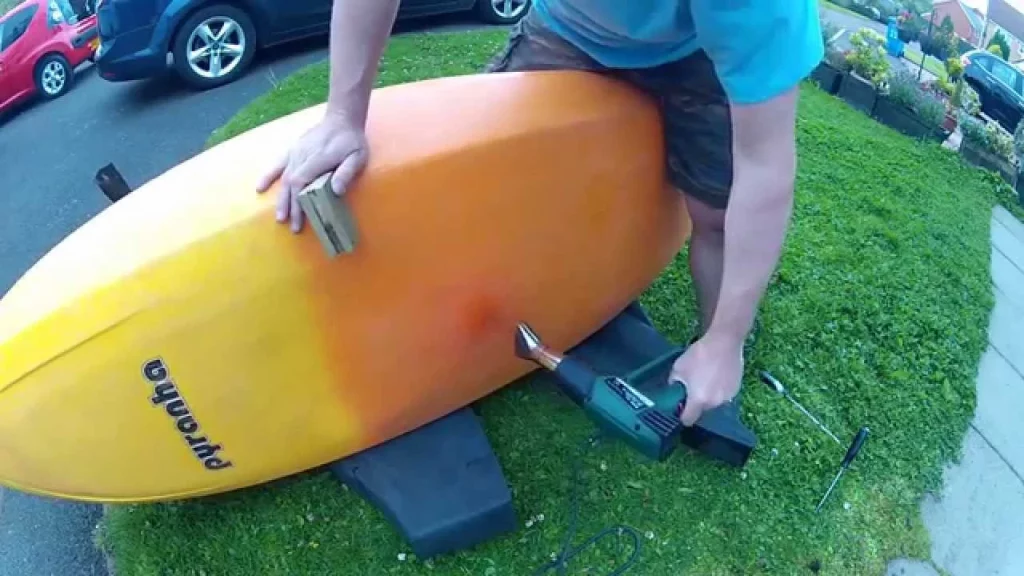
Plastic Kayaks
- Clean the Area: Remove any dirt or debris.
- Sand the Damaged Area: Create a rough surface for better adhesion.
- Heat the Area: Using a plastic welding kit or heat gun, melt the plastic repair material.
- Apply the Melted Plastic: Fill the hole or crack with the melted plastic.
- Cool and Sand: Allow the repair to cool and sand it smooth.
Composite Kayaks
- Clean and Sand: Prepare the surface by cleaning and sanding.
- Cut the Fabric: Cut the fiberglass or carbon fiber cloth to fit over the hole.
- Mix and Apply Epoxy: Mix the epoxy resin and apply it to the cloth and damaged area.
- Cure the Repair: Allow the epoxy to cure as directed by the manufacturer.
- Finish the Surface: Sand and paint or gel coat as needed.
Common User Questions
- Can I repair my kayak myself?
- Yes, for most minor to moderate damages. Major damages should be evaluated by a professional.
- How long does the repair take?
- Typical DIY repairs can take anywhere from a few hours to a full day, including drying time.
- Is it safe to use a repaired kayak?
- If repaired correctly, the kayak should be as sturdy as before. Regular inspections are advisable.
Conclusion
Fixing a hole in a kayak is a manageable task for most kayak owners. With proper assessment, the right tools, and attention to detail, most repairs can be carried out at home. As kayaking continues to grow as a favorite recreational activity, understanding how to maintain and repair your vessel will ensure that you can continue to enjoy the water safely and confidently. If in doubt, consult with a professional to assess the damage and determine the best course of action.
Read More about Kayaks:
- What to Wear for Kayaking in Summer
- How to Store a Kayak in the Garage
- What is a Skeg on a Kayak
- What is a Tandem Kayak
- How to Build a Homemade Kayak Launch
- How to Get in a Kayak
- What to Wear for Kayaking?
- How to Transport a Kayak Without a Roof Rack?
- How to Build a Kayak Rack for an RV?
- Are Inflatable Kayaks Safe?
- How to Build a Rack for Kayaks?
- Do Kayaks Have a Weight Limit?
- Wilderness Systems Pungo 120 Kayak Review
- Is It Hard to Kayak?

Hi, I’m Steve, the passionate kayaking enthusiast behind Outdoor Bravo. As an avid adventurer and nature lover, kayaking has been a central part of my life for as long as I can remember. My love affair with the water began during my childhood, and it has only grown stronger over the years. From serene lakes to rushing rivers and even challenging ocean tides, I’ve navigated various water bodies, seeking new thrills and unforgettable experiences.