
Whether you’re an avid kayaker looking to enhance your watersport experience or a nature enthusiast seeking a DIY project to add convenience to your outdoor adventures, building a homemade kayak launch can be a rewarding and fulfilling endeavor. A kayak launch provides a convenient and safe way to enter and exit the water, making your kayaking adventures smoother and more enjoyable. In this comprehensive guide, we will walk you through the step-by-step process of how to build your kayak launch.
A homemade kayak launch can greatly improve your kayaking experience by providing a stable and accessible platform for launching and landing your kayak. With the right planning and execution, you can create a durable and functional launch that complements your waterfront property or favorite paddling spot.
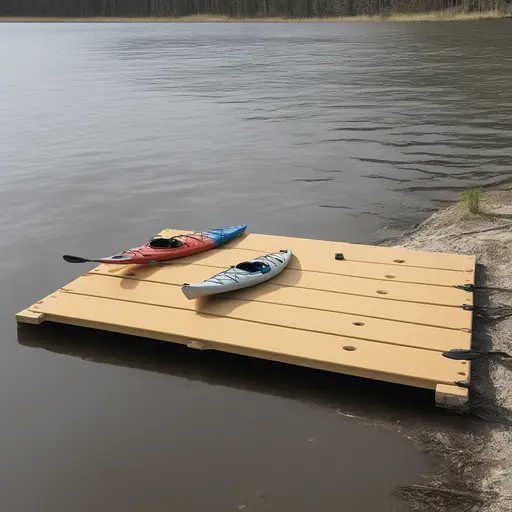
Ultimate Tips to Get in a Kayak
Choosing the Right Location
Selecting the optimal location for your kayak launch is crucial to its success. Consider the following factors when choosing a spot:
- Water Depth: Choose a location with sufficient water depth to accommodate the kayak’s launch and landing without hitting rocks or debris.
- Accessibility: Ensure that the location is easily accessible from land and provides a safe pathway to the water.
- Shelter: If possible, choose a spot that offers some protection from wind and waves to make launching and landing more comfortable.
Materials and Tools Needed
Gather the necessary materials and tools before starting your project:
Materials:
- Pressure-treated lumber
- Decking boards
- Plywood
- Galvanized screws and nails
- Non-slip surface material
- Handrail materials (wood or metal)
- Concrete mix (if needed for support pillars)
Tools:
- Measuring tape
- Level
- Circular saw
- Drill with bits
- Hammer
- Screwdriver
- Safety gear (gloves, safety glasses, etc.)
Designing Your Kayak Launch
Sketch out a design for your kayak launch, keeping in mind the dimensions, shape, and features you want to include. Consider the following design elements:
- Platform Size: Determine the size of the platform based on the number of kayakers likely to use it simultaneously.
- Access Ramp: If the water’s edge is not level with the ground, include an access ramp to ease the process of getting in and out of the kayak.
- Handrails: Plan for sturdy handrails on both sides of the launch to provide support and stability.
Learn More: Transporting a Kayak Made Easy
Step-by-Step Construction Guide
Clearing the Area:
- Clear any vegetation or debris from the chosen site to create a clean workspace.
Building the Framework:
- Measure and mark the dimensions of the platform and ramp on the ground.
- Dig holes for support pillars (if needed) and install them securely. Alternatively, you can use concrete footings for added stability.
- Construct the frame using pressure-treated lumber, following your design’s dimensions. Ensure the frame is level and secure.
Adding Non-Slip Surface:
- Attach plywood to the top of the frame using screws, creating the base of the platform.
- Cover the plywood with a non-slip surface material to enhance traction and safety.
Installing Handrails:
- Attach handrails to the sides of the platform using galvanized screws or nails.
- Ensure the handrails are at a comfortable height and provide a sturdy grip.
Safety Considerations
Prioritize safety when building your homemade kayak launch:
- Sturdy Construction: Use high-quality materials and build a strong structure that can withstand the elements and regular use.
- Non-Slip Surface: The platform and ramp should have a non-slip surface to prevent accidents, especially when wet.
- Handrails: Secure handrails are essential for stability and support, especially during entry and exit from the kayak.
- Water Depth: Ensure the water depth around the launch is suitable for kayaking to avoid accidents and collisions with underwater obstacles.
7. Maintenance Tips
To ensure the longevity and functionality of your homemade kayak launch, consider these maintenance tips:
- Regular Inspections: Periodically inspect the launch for signs of wear, rot, or damage. Replace any damaged components promptly.
- Sealing and Painting: Apply a weather-resistant sealant or paint to protect the wood from water and sun exposure.
- Cleaning: Keep the launch clean from debris and vegetation, as these can cause slips and falls.
Read More: What is a Skeg on A Kayak?
Conclusion
Building a homemade kayak launch can greatly enhance your kayaking experience and provide a convenient and safe way to enjoy the water. By following this comprehensive guide, you can design and construct a functional and durable kayak launch that will serve you well for years to come. Remember to prioritize safety, plan your design carefully, and enjoy the satisfaction of creating a useful addition to your outdoor adventures.
Read More: What is a Tandem Kayak?

Hi, I’m Steve, the passionate kayaking enthusiast behind Outdoor Bravo. As an avid adventurer and nature lover, kayaking has been a central part of my life for as long as I can remember. My love affair with the water began during my childhood, and it has only grown stronger over the years. From serene lakes to rushing rivers and even challenging ocean tides, I’ve navigated various water bodies, seeking new thrills and unforgettable experiences.